Showing posts with label outside. Show all posts

Monday, July 23, 2012

Seven Years...

Today not only is my birthday, but it marks seven years that we have been living here at Foxcroft. We "officially" moved in on July 23, 2005. It was a beastly hot day to be loading and unloading a Ryder truck. I remember going by the bank and seeing their thermometer read 100. Well today is likely the hottest day we've had since then. This afternoon when I came inside from painting on the North side of the house our thermometer said 102. The sensor is behind the gutter and in the shade.

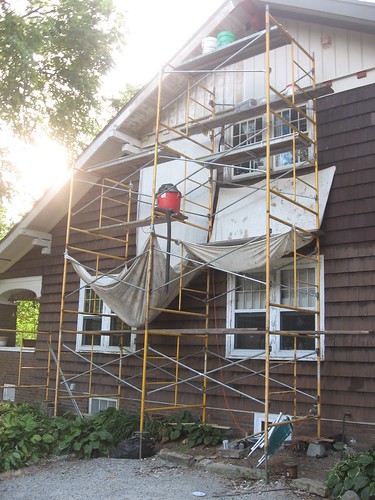
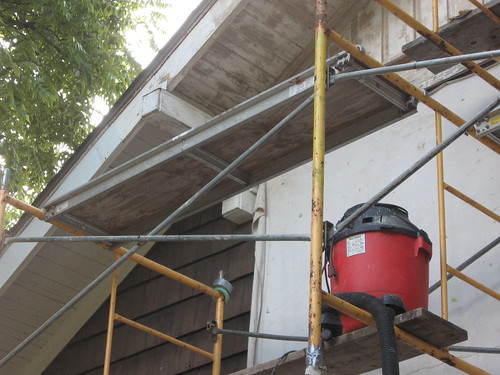
It must be too hot for my camera to work so here are some pics I took on Saturday when I was sanding the areas that I'm now painting.

Here is the overall view:

And a few close ups:


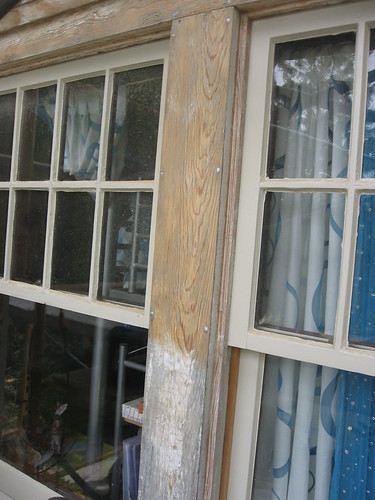
You can tell where I've already painted (trim) and stained (shingles)


And the difference between sanded wood ready for new paint, and the untouched porations where the paint has failed. I don't believe the trim has been painted in nearly 30 years.


Thursday, December 02, 2010

Guttersnipe*

*noun
a child of the slums who spends most of his or her time in the streets: contemptuous term applied to anyone regarded as having the manners, morals, etc. of the gutter

Origin: orig. (Brit dial.), the common snipe, which picks food out of gutters


Yes in the five years we have been at Foxcroft I have been a guttersnipe about our front gutter. Since the first winter I have known that there was a problem with the gutter in that it leaked over the front porch steps and created a gigantic ice hazard that made it nearly impossible to use the front door.

I'd had several people offer advice on what to do, but got nowhere. Finally I mentioned it last summer to Tim, a fellow member of Friends of Historic Preservation, who is a highly regarded handyman. He came over this fall and said, no problem, if I got him some copper to patch with, (our gutters are made of copper and are original to the house) he'd drop the gutter at the end where the downspout was (Which over time had become the HIGH spot) and patch in the bracket. Well he came and discovered that unlike most gutter systems this one has a continuous flap that must run a foot under the entire roof. There was no way to do what he had originally planned. I asked what our options were, he said really the only thing that could be done is to move the downspout to the low spot on the gutter which is over the steps. Tim came last weekend and we did just that.

First I carefully removed the downspout and set it aside:


Then we sweated out the downspout from its place on the North end of the house.


Then we cut a patch for the hole and cleaned it:


And hammered it to make sure it would lay flat:


Then after fluxing everything it was soldered into place:


Then we cut a hole at the low spot just north of the porch steps post:


And soldered the downspout into the new location:


At this point Tim was ready to call it an afternoon. I set the downspout back in and realized I would need some elbows to push the bottom of the downspout back out so it would clear the post steps pillar. I went to the hardware store Monday during my lunch hour and then set that all up. As I drove back to work it started to rain. When I came home Monday night I got out the ladder and went up to look, and there was nearly no water left in the gutter. I am hoping for a much safer winter!

I really don't like the way the gutter looks, having lost the symmetry, but in this case safety is much more important.

Monday, October 12, 2009

Road Trip 2009

As mentioned before, I did finish my shingles and then took down the scaffolding for winter. Here are the new shingles above the window:


As soon as I took everything down I got a call that my new dining room storms and screens were ready. I had ordered these about a month ago from Adams Architectural. I had Adams build windows for the new gable we put in upstairs, and they also did the wooden storms and screen that we have on second floor. We then used them to build storms and screens for the back of the house. I really am impressed with their work. When I called to order three more, I was surprised to learn they had moved from near Davenport (an hour away) to Dubuque (an hour and 45 minutes away)

Friday I drove to Dubuque to get my three storms and three screens. Adams new location is in the warehouse district of Dubuque, and very picturesque area:


I went in to say "hello" and then got sent out to drive to the loading dock:


In five minutes I was loaded up:


But I wasn't ready to go home yet, because on the other side of the block where Adams is located is The Restoration Warehouse (formerly Mid-America Salvage) which is the place I got our flooring and bookcases.

I spent an hour looking around and am interested in what looked like a grill from an old service elevator that would make some nice fencing back by the fish pond. I hope they email me a price as the piece wasn't marked.

So added to my winter project list will be painting the storms and screens so they can be hung in the spring.

Tuesday, September 29, 2009

An OUTSIDE "Mushroom Factor" Tale

It's been a while since I've had a "mushroom factor" experience. I wrote about the phenomena here: The Mushroom Factor. Basically the mushroom factor is what happens when what looks like a small project quickly "mushrooms" into a much bigger one when you realize all the sub projects that need to be completed.

I was hoping to scrape and paint the trim on the dining room and chimney windows before winter. I also thought I could probably stain the shingles around them too. That was before I noticed how rotten the drip cap was above the three dining room windows:


The drip cap was just as bad with chewed up shingles above the west chimney window too:


The shingles are two layers deep and are attached from the bottom of the wall up to the top. This means that to replace the drip cap I need to remove TWO layers of shingles whose ends are buried by those above them.

I decided to get a razor blade and cut away at the first layer carefully to see how hard it might be:


I quickly realized I needed a better tool for this and went to visit Pete. I told him what I needed and he sent me home with this:


That is his "toolwerks" tool. We put a head on it with teeth and the whole thing reciprocates like a tiny sawzall.


I went home and had the first layer out in no time at all. Here is what I removed:


And here is the second layer of shingles exposed and ready to cut. You can faintly see the lighter line behind the bottom of the upper row. That is the exposed new cedar against the older stained wood:


I had the second row out pretty quickly too. I cut at an upward angle, hopefully I can duplicate that angle on the new shingles I'll add later. Here is the same area with the second layer removed:


I then got out my "catspaw" and pried out the drip cap:


And here is the area with the old drip cap out:


I was able to cut some new drip cap to fit above both the dining room and chimney windows. I'm almost done painting it and will install it later this week.

I'm hoping over the weekend to cut new shingles to put back up in place...

So the upshot is I probably WON'T get the trim painted or the rest of the shingles stained, yet this fall. There are home Iowa football games the next two weekends, and the weekend after that I promised Lisa we would try to finish stripping the floor of the office so we can get it varnished before winter too.

I will probably take down my scaffolding after getting the new shingles in place and admit that the "mushroom factor" has once again gotten the better of my schedule!

Wednesday, September 09, 2009

Pergola in Action!

To finish a great Labor Day/Hawkeye football weekend we had Laurel's birthday dinner outside under the pergola. Both sets of grandparents and Aunt Lori and Uncle Matt were there. We seated a table of six under the pergola, and another table of four in the patio between the pergola and the pond:


On Saturday the Hawkeye footbal team played my undergrad alma mater, the University of Northern Iowa.

My Panthers gave Iowa all they wanted and then some. Setting an NCAA record, Iowa won the game by blocking TWO field goal attempts on consecutive plays, to win 17-16.

We had guests for the game from Los Angeles, Portland, Oregon, and St. Louis as well as our usual visitors and friends. Here is one pic from before the game:


And one with three of my best childhood friends after the game:


And even though it wasn't from this past weekend, here is a special shot of the "Corn on the Cob" cupcakes that Rowan made after she took her cake decorating class, a great way to finish the "end of summer" post here on Foxcroft:


The "kernals" are jelly beans, the "butter" are starburst candies.

Wednesday, August 19, 2009

Beefier

So the 2 X 2 boards just weren't enough for the top of the pergola. So I went and got 12' 2 X 4's. My problem was I didn't want to take the 2 X 2's off. So, I just cut off the ends that extended beyond the main beams. I butted the 2 X 4's to the other boards and had them up pretty quickly. It looks much better:


I also ordered solar powered lights to string over the top. It was my gift to Lisa for our anniversary. They looked good here:


But last night I noticed that they weren't working...

Tuesday, August 18, 2009

In the Catbird Seat

After getting the main beams up it was time to put on the cross beams, I used all my salvaged lumber on the main beams so I bought treated 2 X 8 boards. The easiest way to put them up was to place them on top of the main beams and mark them where they would cross the main beams:


Then we used the jig saw to cut notches while we were on top of the pergola, rather than take each board up and down:


After we got the cross beams up we put on 2 X 2 boards over the top. As soon as we were finished both Pete and I said the 2 X 2's looked really stupid, because they weren't correctly scaled with the other boards:


As you can see above, they are barely noticeable. Next post will be how we corrected that situation.

Friday, August 07, 2009

Why We Needed a Scarf in August

scarf 2 (skärf)
n. pl. scarfs (skärfs)
1. A joint made by cutting or notching the ends of two pieces correspondingly and strapping or bolting them together. Also called scarf joint.
2. Either of the correspondingly cut or notched ends that fit together to form such a joint.
tr.v. scarfed, scarf·ing, scarfs
1. To join by means of a scarf.
2. To cut a scarf in.
--------------------------------------------------------------------------------
[Middle English skarf, as in scarfnail, probably from Old Norse skarfr, end piece of a board cut off on the bias.]


--Free Online Dictionary


So one of the great joys of working with salvaged materials is making them fit. All our floor joists were roughly 142 inches long, which was what we used on the east-west pieces of the pergola cross bars. That gave us just short of a two foot overhang. To get boards with a corresponding overhang on the north-south pieces we needed to scarf pieces together.

To start we clamped the boards side by side to each other, without overlapping, for the scarf joint distance. Then cut a series of 1" deep passes over both the boards with the circle saw. Since the boards are 2" thick taking out half of each board will give us the correct depth for the scarf joint.


Then we took a hammer and knocked out what was left between the grooves.


Our next step was to then take a wood chisel and get rid of any obviously high parts. After that we hit them with the plane


We then put the boards together in a dry fit to see if we liked it. Here we did


To keep the joint together we used Gorilla Glue. You don't want to get that on your fingers or anything else you value. We used a little chunk of wood to spread it on the end of each joint.


Then we put glue on the scarf area of both boards


We put the two sides together and clamped them. Then we sent five stainless steel screws into the first side.


Then we flipped it over and did the same on the other side.


After letting it dry we put it up on the pergola and clamped it into place so we could drill it for the carriage bolts that hold it in place.


Of the four north-south boards three have a single scarf joint and one has two scarf joints. My guess is that in a few years with enough vegetation growing on top of it, none of them will be noticeable!

Monday, August 03, 2009

Hubris or "The Other 90% of the Time"

As a famous person once said "The first 90% of a project takes 90% of the time, the last 10% takes the OTHER 90% of the time..."

When we left off on the pergola build, Pete and I had set two of our four columns and were confident that the other two would go quickly. On Sunday afternoon we set the third column in about 20 minutes and were feeling pretty proud of ourselves. We reset the hoist for the last column and went to move it. As we lifted it into place a small chunk broke off the bottom (in hindsight we should have recognized this as ominous foreshadowing) We thought, "No matter. we have a total of six columns, we'll use one of the extras." We went and got another one and wrestled it into place.

We started pumping the hydaulic and were over the second base, with only 6 inches of re-bar to clear, when we realized the hoist wasn't going any higher. We lowered the column, repositioned it, and tried again. Same result. We lowered it again and tried to take some links out of the chain thinking we hadn't hooked it up correctly. Still not enough lift. Then the serious head scratching began.

Being a Sunday the rental place was not open. We decided to take the hydraulic arm apart. Neither had ever done anything like that before. We really couldn't really figure how to get it apart. We went and got fluid to add to the resevoir but it was already nearly full and we could force the arm back down when it was pumped.

Pete then called a friend whose daughter plays volleyball with Pete's younger daughter. He is a farm implement dealer in a town about 30 miles away. Pete thought this would be right up his alley. Luckily he happened to be in Iowa City, and came over in half an hour. He took it apart and looked it over carefully. After nearly an hour of not getting it to work either he casually mentioned that he HAS A HYDRAULIC ENGINE HOIST AT HOME IN HIS WORKSHOP!

Pete and I went on Monday morning to get it from his place. It had never ever been used. We brought it back and set it up:


We found, like the other hoist, it was too short. We blocked it with cement and posts and started to lift. I had to sit on the back end to keep it grounded:


In short order we had it over the re-bar:


While we were waiting for the mortar to dry a little (we mixed it too wet) I pulled out a cross beam and laid it into place on the columns we had already set. The cross bars are also salvaged. They were floor joists from the house the columns came from. The joists were full dimension 2 x 10 and were DOVETAILED into a 14 inch square beam that ran through the center of the house. The left side in the picture below was the profile the boards had when in the beam. The right side is straight because we had to sawzall them out to get them lifted.


I liked the profile so much we decided to use it for the cross bars. Here are the first boards in place.


Next post I'll tell about how we re-worked the beams to make the cross bars.

Friday, July 31, 2009

Going Vertical

After laying the pavers for the patio our next step was to build the bases for the pergola columns. The bases are three courses of cement blocks that have outer faces made to look like cut stone. These were salvaged, along with the columns we are placing above them, from a farmhouse torn down for a new elementary school, shown below:


The bases each had two concrete caps on them, that we ended up not using, here are some stacked up before we started working:


Pete had set re-bar into the footings for the columns that we had dug and poured before laying any of the pavers. He and I set the blocks with mortar, and string leveled the first course on all four columns, then we laid the second course and re-checked for level. We did the same for the third course too. We then put more cut re-bar into each base and filled them with concrete. I had bought limestone for the caps to replace the cement that we decided not to use. We drilled a hole into each large cap and set a rebar in the middle of each column, slipped the cap over it and mortared the top to the base. To get a smaller cap on top I had bought a very large capstone and with the grinder we scored it and broke it into four pieces. These were also drilled and then slipped over the re-bar and mortared to the first cap, checking for level as we went.


After this we knew we were in for the hardest part of the project: placing the columns on top of the bases. In removing the columns it was all Pete and I could do to carry and move them. Our guess was that they weigh somewhere in the neighborhood of 300-350 pounds each. To be honest we were very unsure how to lift them up and drop them carefully onto a bed of mortar and be able to set them plumb. In the end we decided to rent an engine hoist.

Last Saturday afternoon the rental place called and said the hoist was available. We used a dolly to move the columns up to the patio.


After setting the hoist up we discovered its maximum lift was a foot lower than we needed. So we blocked it up with concrete blocks and 6 x 6 posts. We put it in place and got the first column over to the base. We dropped the chain through the column (they were poured originally with a piece of galvanized downspout through the middle) and slid a piece of re-bar through the chain at the bottom and hooked it up to the hoist.


Once we had it over the top of the re-bar we positioned it and lowered it just enough to catch the re-bar.


Then we marked a diagonal from each corner of the top cap to the re-bar in the middle and measured 4 1/2 inches from the re-bar along the diagonal. The base of the columns are 9 inches in diameter, so this gave us a guide as to where to set the columns.


We had also cut wooden blocks one inch tall and one and a half inches long and marked them so we could set them on the diagonal marks we had made.


We had already mixed a fairly dry batch of mortar. We then laid it onto the cap, and then re-set the wooden blocks onto their marks.


We then lowered the column down into the mortar until it sat on the blocks. The re-bar at the bottom of the colums was one half inch, and the chain link was another quarter of an inch thick. By sitting on the blocks we had just enough clearance to wigggle the re-bar out and pull the chain up the top. We then gently tilted the column to one side and then the other to pull the blocks out of the way. We then slightly twisted the column to set it into the mortar. Climbing the step ladder to the top of the column we used a square and a level to check for plumb. After being satisfied with it. Pete tooled out the extra mortar.


After the post was set we mixed a fairly wet batch of concrete and using a cut off milk jug poured down and filled up the cavity in the column, securely tying it to the base.


When we had the top filled we placed the capital on the top. We had drilled them also and place a threaded bolt through. The bottom end of the bolt went into the wet cement to tie the entire structure together. The top end of bolt will have a drilled 6 x 6 piece set onto it. This will give us something to attach the rafters to.


We set the first two posts and stopped Saturday evening for dinner. We were very confident we could finish the next two on Sunday afternoon without any problems at all. How wrong we were!

(to be continued...)