 Here is a record of our restoration of a 1928 craftsman. We will be the second family to live in the home. Watch our progress when we prevail and our privation and pratfalls as we do not.

I just got this email from my internet service provider:
Dear Personal Web Space User,
Due to multiple server issues, your personal web space has been created anew on a new server. Due to the nature of this issue, your personal web space could not be restored from a backup. Unfortunately, you will have to reload your web pages so you can share them.
What this means is none of the images I put into my posts from 2005 until last summer are now visible. I guess I'll have to sort through all my multiple files of pictures to reload them and relink them through blogger.
I guess I needed another project?
Monday, December 14, 2009
Tuesday, December 01, 2009
Some Trim Cuts I CAN do successfully!
In my last post I neglected to mention or display the trim cuts I can do successfully. Here is the new bump out before I started trimming it:

The baseboard was left over from when I did the upstairs 3 years ago, I had stashed two pieces away in the office closet. Here is the exterior miter:

The piece behind the room door to the right fit nicely, however on the closet door side, There was only 1/2 an inch between the wall and the backband, so I had to mark a line, saw down 1/4 of an inch, then chisel out so the baseboard would fit snugly to the wall:

And here it is in place:

The base shoe was saved from when we had to work on the dining room wall.

I hit the edge of the baseboard miter with a little stain and it looks great.
The baseboard was left over from when I did the upstairs 3 years ago, I had stashed two pieces away in the office closet. Here is the exterior miter:
The piece behind the room door to the right fit nicely, however on the closet door side, There was only 1/2 an inch between the wall and the backband, so I had to mark a line, saw down 1/4 of an inch, then chisel out so the baseboard would fit snugly to the wall:
And here it is in place:
The base shoe was saved from when we had to work on the dining room wall.
I hit the edge of the baseboard miter with a little stain and it looks great.
Wednesday, November 18, 2009
Coping With My Inability to Cope...
... as in "cope cuts." I am very bad at using a coping saw. I was able to do passable copes when I had to cut new baseboards for the upstairs, but when it comes to coping the picture railing, forget it.
You may ask "How did you manage to successfully trim four rooms upstairs with picture rail if you can't cope?" The answer of course, is that I used salvaged rail and made sure to take advantage of the copes that were already cut by people FAR more skilled than I am. It became a challenge in itself to figure out how to take advantage of the copes already cut!
Which leads to trimming the new bump out in the office/spare bedroom. Way back in the 1950's a temporary closet had been built into that space. We ripped it out and put in our chase for the HVAC and electrical to go upstairs. However the picture rail in the corner had already been cut and removed long ago. I had barely enough salvage left to do this last little job, but it meant having to do a cope cut myself, so here it is:

The top fit pretty well, but the bottom has some real issues. You can see that when I put it up into place:

In my defense it doesn't look that bad when you're standing in the room, and that corner is very out of the way. If I slather enough wood filler up there, it will be invisible.
What you may also notice from that last picture is that the original rail was cut short of where the new bump out starts so I was forced to GLUE a tiny block of wood in place to fill that gap. Once I put a little touch up paint over the glue that bubbled out, it too should be invisible. (I hope!)
You may ask "How did you manage to successfully trim four rooms upstairs with picture rail if you can't cope?" The answer of course, is that I used salvaged rail and made sure to take advantage of the copes that were already cut by people FAR more skilled than I am. It became a challenge in itself to figure out how to take advantage of the copes already cut!
Which leads to trimming the new bump out in the office/spare bedroom. Way back in the 1950's a temporary closet had been built into that space. We ripped it out and put in our chase for the HVAC and electrical to go upstairs. However the picture rail in the corner had already been cut and removed long ago. I had barely enough salvage left to do this last little job, but it meant having to do a cope cut myself, so here it is:
The top fit pretty well, but the bottom has some real issues. You can see that when I put it up into place:
In my defense it doesn't look that bad when you're standing in the room, and that corner is very out of the way. If I slather enough wood filler up there, it will be invisible.
What you may also notice from that last picture is that the original rail was cut short of where the new bump out starts so I was forced to GLUE a tiny block of wood in place to fill that gap. Once I put a little touch up paint over the glue that bubbled out, it too should be invisible. (I hope!)
Tuesday, November 10, 2009
It's a DIFFERENT Shade, Really!
So I've been working on the room that will be Lisa's office space and a guest bedroom. This room was originally Helen's bedroom. When she and her husband returned to Foxcroft in the mid 1950's it became their bedroom. I'm guessing the room was last painted about that time. We have already painted the ceiling (after stripping off the wallpaper on it) and stained and varnished the floors. Here are a few shots from painting.
Primer covering the 50 year old paint job, you can also see the cracks I filled in:

When I pulled the radiators 4 years ago we discovered the original rose color for the room, that was mentioned in the plan book Bess gave the builders. The room seems to have been painted a grand total of two times before our current project:

Here's the new paint, which looks a LOT like the old, except maybe not quite as "minty." The color is "Sweet Sage."

And some more:

To remove the ceiling paper I had removed the picture rail. We cleaned, stained and varnished it. With the painting done I could put it back up.

And here is the railing back where it belongs.

Primer covering the 50 year old paint job, you can also see the cracks I filled in:
When I pulled the radiators 4 years ago we discovered the original rose color for the room, that was mentioned in the plan book Bess gave the builders. The room seems to have been painted a grand total of two times before our current project:
Here's the new paint, which looks a LOT like the old, except maybe not quite as "minty." The color is "Sweet Sage."
And some more:
To remove the ceiling paper I had removed the picture rail. We cleaned, stained and varnished it. With the painting done I could put it back up.
And here is the railing back where it belongs.
Monday, November 09, 2009
I HATE it When That Happens!


Yes, I am almost finished working in the office/guest bedroom and when I went to move the light, the outlet plate and half of the outlet came with it.
Fortunately I have a few New Old Stock duplex plugs left from my Grandfather's electrician business. I managed to get it replaced pretty quickly.
My next post will be about finishing painting and trimming the space.
Thursday, November 05, 2009
Channeling Bess
So it's time to come clean here and admit that over the last 2 months I have been running for political office. At the end of August I filed for University Heights city council. Terms are two years long; we have 5 councilors and a mayor, who also serves a two year term. This means our town elections are like the U.S. House of Representatives, everyone is up every two years. Elections only fall in odd numbered years when NOTHING else in on the ballot.
Bess, who built Foxcroft, was on the original University Heights city council. The town incorporated in 1935, seven years after she built here. She was the only woman on the council, and apparently only served one term. University Heights will celebrate its Diamond Jubilee next summer, our 75th anniversary.
There were 10 candidates for 5 seats on council and 2 candidates for mayor. All the incumbents were running along with 6 challengers. We officially have 798 registered voters in town, which is falsely high. Given that we have many medical, and graduate students who live here for a short while, then graduate and move on, many names on the rolls are no longer here. I would guess our electorate is closer to 650.
When I decided to run I made a vow to walk around town at least once a week, knock on doors and talk to people. I did that and it was fascinating. I really had fun. Besides the conversations, stepping onto everyone's porch or stoop allowed me to notice details about houses that you don't pick up on even when you're on the sidewalk. We have so many 1920's-1940's homes that are in such good shape. The mid century modern homes are spectacular, and our "new" homes from the 1960's and 70's are also of very high quality. The only architectural beef I have is with our apartment complex that was build right after WWII. It is being converted to condominiums and I was saddened to see their original windows get replaced, the new ones don't fit the character of the building well.
We had one political event, a candidate forum that drew about 150 people. With so many candidates and a promise to keep the event to only 2 hours long, we were given three questions in advance. Each question, along with our opening and closing statements were to not exceed 2 minutes. Everyone held to it.
Typical voter turnout for municipal elections has been in the 200's. The record turnout was 350 in 2005 (the first year we voted here) due to a library levy being on the ballot. On Tuesday 413 people voted. That is a 51.8% turnout officially or about 64% using my adjusted numbers. Iowa City (the larger community that completely surrounds us) had a municipal turnout of 9.7%.
I was one of the winners. I'm happy and more than a little nervous. I take very seriously the public trust of my neighbors. Here are the official results. Scroll all the way to the bottom of the page to find us.
The editorial page editor of the Iowa City paper called yesterday and asked why did I think U-H should remain a separate entity. I replied it's pretty obvious that we participate in our community life to a degree unparalleled by our neighbors, individual voices certainly matter. Who wouldn't want to live in community like that? Who wouldn't want to work to ensure its future?
Sunday, November 01, 2009
Lather, Rinse, REPEAT
We have been working on an interior project lately. The office/guest bedroom/junkroom/dog's room is finally getting some attention.
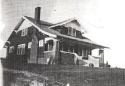
This room was Helen's when the house was built. Here is an original photo:

Here's the same corner last winter:

We stripped off the old varnish using the same procedure we have before. I've written about it:
HERE
HERE
HERE
HERE
And of course who could forget this gem, from the days before "blog" was even a word! Here is a web page I created when we still lived at our old place!
HERE
You get the idea...
Anyway, here is that same corner again, with the floor buffer:

Here are the old radiator holes before I patched them:

Lisa staining:

And varnishing:

Now I'll get to start painting, once Lisa decides on a color.
More to come!
This room was Helen's when the house was built. Here is an original photo:
Here's the same corner last winter:
We stripped off the old varnish using the same procedure we have before. I've written about it:
HERE
HERE
HERE
HERE
And of course who could forget this gem, from the days before "blog" was even a word! Here is a web page I created when we still lived at our old place!
HERE
You get the idea...
Anyway, here is that same corner again, with the floor buffer:
Here are the old radiator holes before I patched them:
Lisa staining:
And varnishing:
Now I'll get to start painting, once Lisa decides on a color.
More to come!
Wednesday, October 14, 2009
New Lid and the Old Place
It's not like I'm stalking our previous house or anything, but even four years after moving I still look out at the old place whenever I'm on that side of town. I had been paying a little more attention this summer after Brian, one of the current owners, said they would be putting a new roof on. He mentioned it would be made of metal shingles. So last month when I went by and saw it was covered in a grid of lathe boards I knew I needed to get a picture. I drove around to the back alley and shot this view from the rear:

What makes me feel really old, is that we put the red roof on in 1996! I hired the job out and am glad I did. I know my limits and laying new shingles is beyond my abilities. It seemed like a bear of a job, since it included a tear off of three old layers of shingles. About 9 months after we re-roofed we got hit by a major hailstorm. Our insurance ended up paying us $4,000 which was nearly 2/3 of cost of the new one.
I went by the house this week and here is how it looks now:

I like the look. The sign out front says that they are stone covered metal shingles, to me it looks very much like Ludowici tiles. Maybe in 15 years we will do the same on Foxcroft but in a green similar to what we already have?
I am so comforted by the fact that our old place is in such capable hands. Brian and Sarah have done a wonderful job of making improvements, and the fact that it is still a single family home is icing on the cake. I must also say that those pictures of the back also show that my paint job, 1998 on the rear side and 1999 on the north still look darn good!
What makes me feel really old, is that we put the red roof on in 1996! I hired the job out and am glad I did. I know my limits and laying new shingles is beyond my abilities. It seemed like a bear of a job, since it included a tear off of three old layers of shingles. About 9 months after we re-roofed we got hit by a major hailstorm. Our insurance ended up paying us $4,000 which was nearly 2/3 of cost of the new one.
I went by the house this week and here is how it looks now:
I like the look. The sign out front says that they are stone covered metal shingles, to me it looks very much like Ludowici tiles. Maybe in 15 years we will do the same on Foxcroft but in a green similar to what we already have?
I am so comforted by the fact that our old place is in such capable hands. Brian and Sarah have done a wonderful job of making improvements, and the fact that it is still a single family home is icing on the cake. I must also say that those pictures of the back also show that my paint job, 1998 on the rear side and 1999 on the north still look darn good!
Monday, October 12, 2009
Road Trip 2009
As mentioned before, I did finish my shingles and then took down the scaffolding for winter. Here are the new shingles above the window:

As soon as I took everything down I got a call that my new dining room storms and screens were ready. I had ordered these about a month ago from Adams Architectural. I had Adams build windows for the new gable we put in upstairs, and they also did the wooden storms and screen that we have on second floor. We then used them to build storms and screens for the back of the house. I really am impressed with their work. When I called to order three more, I was surprised to learn they had moved from near Davenport (an hour away) to Dubuque (an hour and 45 minutes away)
Friday I drove to Dubuque to get my three storms and three screens. Adams new location is in the warehouse district of Dubuque, and very picturesque area:

I went in to say "hello" and then got sent out to drive to the loading dock:

In five minutes I was loaded up:

But I wasn't ready to go home yet, because on the other side of the block where Adams is located is The Restoration Warehouse (formerly Mid-America Salvage) which is the place I got our flooring and bookcases.
I spent an hour looking around and am interested in what looked like a grill from an old service elevator that would make some nice fencing back by the fish pond. I hope they email me a price as the piece wasn't marked.
So added to my winter project list will be painting the storms and screens so they can be hung in the spring.
As soon as I took everything down I got a call that my new dining room storms and screens were ready. I had ordered these about a month ago from Adams Architectural. I had Adams build windows for the new gable we put in upstairs, and they also did the wooden storms and screen that we have on second floor. We then used them to build storms and screens for the back of the house. I really am impressed with their work. When I called to order three more, I was surprised to learn they had moved from near Davenport (an hour away) to Dubuque (an hour and 45 minutes away)
Friday I drove to Dubuque to get my three storms and three screens. Adams new location is in the warehouse district of Dubuque, and very picturesque area:
I went in to say "hello" and then got sent out to drive to the loading dock:
In five minutes I was loaded up:
But I wasn't ready to go home yet, because on the other side of the block where Adams is located is The Restoration Warehouse (formerly Mid-America Salvage) which is the place I got our flooring and bookcases.
I spent an hour looking around and am interested in what looked like a grill from an old service elevator that would make some nice fencing back by the fish pond. I hope they email me a price as the piece wasn't marked.
So added to my winter project list will be painting the storms and screens so they can be hung in the spring.
Tuesday, September 29, 2009
An OUTSIDE "Mushroom Factor" Tale
It's been a while since I've had a "mushroom factor" experience. I wrote about the phenomena here: The Mushroom Factor. Basically the mushroom factor is what happens when what looks like a small project quickly "mushrooms" into a much bigger one when you realize all the sub projects that need to be completed.
I was hoping to scrape and paint the trim on the dining room and chimney windows before winter. I also thought I could probably stain the shingles around them too. That was before I noticed how rotten the drip cap was above the three dining room windows:

The drip cap was just as bad with chewed up shingles above the west chimney window too:

The shingles are two layers deep and are attached from the bottom of the wall up to the top. This means that to replace the drip cap I need to remove TWO layers of shingles whose ends are buried by those above them.
I decided to get a razor blade and cut away at the first layer carefully to see how hard it might be:

I quickly realized I needed a better tool for this and went to visit Pete. I told him what I needed and he sent me home with this:

That is his "toolwerks" tool. We put a head on it with teeth and the whole thing reciprocates like a tiny sawzall.

I went home and had the first layer out in no time at all. Here is what I removed:

And here is the second layer of shingles exposed and ready to cut. You can faintly see the lighter line behind the bottom of the upper row. That is the exposed new cedar against the older stained wood:

I had the second row out pretty quickly too. I cut at an upward angle, hopefully I can duplicate that angle on the new shingles I'll add later. Here is the same area with the second layer removed:

I then got out my "catspaw" and pried out the drip cap:

And here is the area with the old drip cap out:

I was able to cut some new drip cap to fit above both the dining room and chimney windows. I'm almost done painting it and will install it later this week.
I'm hoping over the weekend to cut new shingles to put back up in place...
So the upshot is I probably WON'T get the trim painted or the rest of the shingles stained, yet this fall. There are home Iowa football games the next two weekends, and the weekend after that I promised Lisa we would try to finish stripping the floor of the office so we can get it varnished before winter too.
I will probably take down my scaffolding after getting the new shingles in place and admit that the "mushroom factor" has once again gotten the better of my schedule!
I was hoping to scrape and paint the trim on the dining room and chimney windows before winter. I also thought I could probably stain the shingles around them too. That was before I noticed how rotten the drip cap was above the three dining room windows:
The drip cap was just as bad with chewed up shingles above the west chimney window too:
The shingles are two layers deep and are attached from the bottom of the wall up to the top. This means that to replace the drip cap I need to remove TWO layers of shingles whose ends are buried by those above them.
I decided to get a razor blade and cut away at the first layer carefully to see how hard it might be:
I quickly realized I needed a better tool for this and went to visit Pete. I told him what I needed and he sent me home with this:
That is his "toolwerks" tool. We put a head on it with teeth and the whole thing reciprocates like a tiny sawzall.
I went home and had the first layer out in no time at all. Here is what I removed:
And here is the second layer of shingles exposed and ready to cut. You can faintly see the lighter line behind the bottom of the upper row. That is the exposed new cedar against the older stained wood:
I had the second row out pretty quickly too. I cut at an upward angle, hopefully I can duplicate that angle on the new shingles I'll add later. Here is the same area with the second layer removed:
I then got out my "catspaw" and pried out the drip cap:
And here is the area with the old drip cap out:
I was able to cut some new drip cap to fit above both the dining room and chimney windows. I'm almost done painting it and will install it later this week.
I'm hoping over the weekend to cut new shingles to put back up in place...
So the upshot is I probably WON'T get the trim painted or the rest of the shingles stained, yet this fall. There are home Iowa football games the next two weekends, and the weekend after that I promised Lisa we would try to finish stripping the floor of the office so we can get it varnished before winter too.
I will probably take down my scaffolding after getting the new shingles in place and admit that the "mushroom factor" has once again gotten the better of my schedule!
Tuesday, September 22, 2009
Mystery Revealed
With guesses of "shellac" and "pie," it is time to reveal the mystery picture. IT CAME FROM HERE:

So this

is actually what solidified at the top of a five gallon bucket of exterior shingle stain. The color is "Oxford Brown." The blob was 12" across and over two inches thick. I bought the stain in 2005 and last used it the summer of 2007. Even after taking that thing out the remainder was pretty lumpy. I bought a single gallon of new stain and dumped it into the old and used it anyway. The shingles on the house were last stained over 25 years ago, so anything is an improvement, right?
Here is how it looks on the house:

And to make sure that in the next year or two when I start on another side of the house, I bought another 5 gallon bucket now to start aging it now so it will be sufficiently lumpy when I need it...
So this
is actually what solidified at the top of a five gallon bucket of exterior shingle stain. The color is "Oxford Brown." The blob was 12" across and over two inches thick. I bought the stain in 2005 and last used it the summer of 2007. Even after taking that thing out the remainder was pretty lumpy. I bought a single gallon of new stain and dumped it into the old and used it anyway. The shingles on the house were last stained over 25 years ago, so anything is an improvement, right?
Here is how it looks on the house:
And to make sure that in the next year or two when I start on another side of the house, I bought another 5 gallon bucket now to start aging it now so it will be sufficiently lumpy when I need it...
Wednesday, September 16, 2009
My Other Full Time Home Job/Mystery Picture
With all my posts about pergola building one would think that perhaps I didn't do anything else this summer, but that is certainly not the case. I have also been working at painting the south side of the house.
But before I talk about that, here is today's mystery picture. The first one to correctly identify what it is will win a FABULOUS Foxcroft prize!
Add a comment to this post if you think you know what this is!
I am perhaps the world's slowest painter. It took six years to paint our previous house, but in my defense I do a damned good job of it. What takes so long is that I only paint houses whose last coat of paint is at least 25 years old. This requires me to go down to bare wood and start over.
For the south side I started in the overhang at the peak of the gable so that I could build my scaffolding as tall as possible. I was on top of four 5 foot high sections. I use a heat gun and putty knife to scrape the beadboard. My routine is ingrained into my brain after nearly 10 summers of doing it:
My process is how a single person can reasonably work over a long period of time. Here are some pics I took throughout the summer:

Above is what my paint job looks like next to what it was when I started. The beadboard is without a doubt the hardest part of the whole house, and there is a ton of it.

Similar view from a little farther away

A view of the lookout boxes at the peak of the south gable 25+ feet up

Side view of same also showing my high tech anti-bird's nest device

Speaking of birds' nests, remember this incident earlier in the summer? Yet Another Narrow Escape From Burning the House Down Well here is what I put over the outside of the dryer vent to prevent birds from building nests there. I bought a shower basket thingy at Lowe's and cut it apart and re-sized it to just fit over the vent. Below is my final product sitting next to an unaltered one:

I bought two because there is a bathroom fan vent in the North gable of the house.

I wish I had taken a picture of all the board and battens when I had stripped them, and before I painted! You can see the vent guard in this picture too.

Another similar shot

I finally got the last of the triangular gable area done a week ago. I just finished painting around the second floor windows too. My goal, before winter is to stain the shingles down from the chimney back to the other side of the dining room windows. I hope to scrape and paint the dining room window trim too.
But before I talk about that, here is today's mystery picture. The first one to correctly identify what it is will win a FABULOUS Foxcroft prize!
Add a comment to this post if you think you know what this is!
I am perhaps the world's slowest painter. It took six years to paint our previous house, but in my defense I do a damned good job of it. What takes so long is that I only paint houses whose last coat of paint is at least 25 years old. This requires me to go down to bare wood and start over.
For the south side I started in the overhang at the peak of the gable so that I could build my scaffolding as tall as possible. I was on top of four 5 foot high sections. I use a heat gun and putty knife to scrape the beadboard. My routine is ingrained into my brain after nearly 10 summers of doing it:
- Heat Gun/Scrape
- Sand
- Wash
- Prime
- Caulk
- Top Coat
- Move to the next spot
My process is how a single person can reasonably work over a long period of time. Here are some pics I took throughout the summer:
Above is what my paint job looks like next to what it was when I started. The beadboard is without a doubt the hardest part of the whole house, and there is a ton of it.
Similar view from a little farther away
A view of the lookout boxes at the peak of the south gable 25+ feet up
Side view of same also showing my high tech anti-bird's nest device
Speaking of birds' nests, remember this incident earlier in the summer? Yet Another Narrow Escape From Burning the House Down Well here is what I put over the outside of the dryer vent to prevent birds from building nests there. I bought a shower basket thingy at Lowe's and cut it apart and re-sized it to just fit over the vent. Below is my final product sitting next to an unaltered one:
I bought two because there is a bathroom fan vent in the North gable of the house.
I wish I had taken a picture of all the board and battens when I had stripped them, and before I painted! You can see the vent guard in this picture too.
Another similar shot
I finally got the last of the triangular gable area done a week ago. I just finished painting around the second floor windows too. My goal, before winter is to stain the shingles down from the chimney back to the other side of the dining room windows. I hope to scrape and paint the dining room window trim too.
Subscribe to:
Posts (Atom)