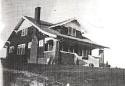
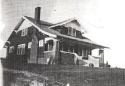
 Here is a record of our restoration of a 1928 craftsman. We will be the second family to live in the home. Watch our progress when we prevail and our privation and pratfalls as we do not.
The first step is to remove the base shoe and baseboard all the way around the room to be salvaged. We saved the base, and discarded the shoe by putting it into a closet. The next step is to find which way the "tongues" in the tongue and groove flooring point, we always pull from the tongue end of the room. This was easy to determine because we could easily see that when we removed the cold air return grates (which we also save).
We start by wasting the last row, by hammering our pry bars into it and splitting it so we can start on the next row. To salvage a floor you need a two foot long flat bar and a hammer. You hammer the bar under the end of the floor and pry gently to loosen and lift the board. If you pry too hard too fast you will break the bottom "groove" off the back end of the board which is sitting under the "tongue" of the next board. In starting in the living room this morning we had two groups each working beside the fireplace:

After pulling the short sections on either side of the hearth, the two groups then could spread out across the room and remove floor boards, with each person working an area easily within reach.

By working together you can easily loosen boards and then hand the board ahead in the area you have already worked. Here is where we've really developed our "system" to work quickly and efficiently with volunteer labor. After a quantity of boards has been pulled The "Denailers" start to grab boards and remove all nails that are left. Tongue and groove floors are nailed through the tongue so the nails are invisible in the finished floor. We remove nails by pulling them through the back of the board. Most floor nails of this era are similar to finish nails in that the heads can be pulled through. Most modern nail pullers that you can buy at the box hardware stores are not very good. The handles are two short. Paul, our salvage barn manager has an antique pair that are almost a foot long, I am keeping my eye out for a set like that. (Can you guess what my job was today?)
After the boards are denailed they are bundled and wrapped. Here is how we have been able to utilize volunteers that would like to help but are fearful they may not have the skills or strength to do most salvage jobs.
We set the bundlers up with folding sawhorses and banding tape. They put two boards together, joining tongue and groove. I recommend stacking bundles 5 boards high, for a total of 10 per package. I'll explain why in a moment. Here is one bundler working:

Here is a completly wrapped bundle:

After a bundle is wrapped we measure and mark it. If you have ten in the bundle you measure to the nearest foot the length, (we recommend always rounding down) and then add a zero for the total linear foot length. We write that number on the bundle and the job site (to make it easy for someone buying the stuff to get floor that matches. Its fast writing the linear foot length and at the salvage barn I made a table that tells you what to divide the linear foot total by to get the square foot amount. 2.25 boards are easy, divide linear feet by 5.
In just under an hour our crew had pulled the living room:

All of this floor is going to Tom and Shelly, who helped pull today, so we loaded right into their pick up truck. What we pulled today, added to what we had pulled last time, wrapped but couldn't take with us added up to 1559 linear feet, roughly 300 square feet. Here is how it looks in the back of the truck, the shorter boards are all hidden in the bed, but we had quite a few long lengths:

So we started today at 9:45 and by 12:00 everyone was ready to go home.
4 comments:
Thanks for this helpful blog. I found it when i was trying to get advice on the best way to salvage the strip floor from the demo job i am doing on my home's old addition.
Frank
I'm glad if what was here helped you save some old flooring! Whenever I do any analysis of site visits, this page and my one on how to install a floor are near the top!
Our problem is that the flooring is nailed through to the crosspiece below with two large nails every couple of feel...trying to extract them is really difficult. Any suggestions?
Jennifer,
Are the nails through the top of the flooring or through the tongue? If through the top then work like described here anyway. Are the nails finish nails (very small heads hardly bigger than the shaft of the nail itself) or common nails with a large flat head? IF the former you still want to pull them through from the back. If the latter you want to hammer them out from the bottom and pull from the top, but it must be done carefully so as not to damage the top of the floor.
If there are a large number of nails though the top of the floor, you do have to wonder if the floor is worth salvaging... Any surface holes will have to be filled.
-Mike
Post a Comment