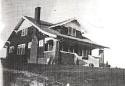
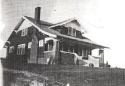
Saturday, March 31, 2007

My White Elephant Light

I re-wired my "white elephant" light yesterday. Since nearly everything but the border paper for the dining room is finished, and it's on order, I decided it was time to re-wire the light. I had installed it last fall but hadn't written anything about it since I knew it needed work. Here is how it looked after I had taken down the four individual globes and remembered I should be documenting:


Why is this a "white elephant" light? Because that is where it came from of course!

In family legend my paternal grandfather (farmer turned electrician) came home one day in the early 1960's and told grandma that he had bought a rather large old house in the very small Iowa town that they had retired to. Done deal, no discussion. Her immediate comment was "Why would anyone want that white elephant?" and the name stuck. The house sat in the middle of two town lots, grandpa moved it onto one lot and sold the empty lot for what he had paid for the house. The house may have been built as an upstairs/downstairs two-flat but I doubt it. Regardless it had been two apartments for many years before grandpa bought it. He inheirited "Bernadine" the upstairs tenant (I vaguely remember her, very old and scary) she stayed for years. He always held the downstairs apartment open, when he had a vacancy, to make sure that any new teachers coming into town had a place to live. My light came from that house.

My dad put it in my bedroom when I got my own room at age 12. Since we lived in a 1960's two story at the time our ceilings were only 8 feet high. Grandpa told dad he had to re-wire the light before he could hang it and gave him some clear light cord to do it with. Dad shortened the chains and hung it. When my parents moved into the home they ran as a bed and breakfast in the late '80's my light became their dining room light. When they moved out of that house, the same month we started cleaning up here, March of '05, I got my light given back to me packed in a box.

I wanted to lengthen the chains back a bit and after hanging the light in the dining room I realized that the wires ran a little too close to the bulbs up in the central pan for my comfort. We had used this light for 4 months without lights up in the pan.

I started by taking everything down and pulling out the old wires. I had ordered, from Sundial Wire, 100 feet of braided gold lamp cord:


I decided to cut long lengths and make sure I had plenty of room to run my wires around the edge of the pan rather than across the middle so they wouldn't come near the bulbs in the center


I couldn't figure out how to get the individual sockets apart. I was afraid to pry them apart with a screw driver, like you do with today's sockets. They are heavy, about triple the weight of new ones. The sockets are all stamped "Bress" and have a patent date of 1899 on them. The globe fitters are stamped "Hubbard." I resorted to calling my Dad to come over and he pried one apart with a screw driver after frankly admitting he couldn't remember how he got them apart before.


I forgot to shoot pics, as i was so engrossed in getting all my wires connected back correctly. I'm very glad the plastic insulation inside the rayon cloth is color coded. Eventually I got it back up. I put compact flourscents in the main pan to reduce heat up there, and 15 watt bulbs in the individual globes, and the globes are frosted and cut glass and are quite beautiful.


I doubled the drop on the chains (of course Dad had saved them all these years and they were included in the box when I got it) The total drop on the fixture now is two feet.


The drop on our original light in the living room is three feet, which is a little low. What I find interesting is that the dining room light is in the middle of the room, but you don't want to put the table directly under it, as it would block the natural aisle from the kitchen to the living room. The dining room, inexplicably, lost it's original fixture, and it wasn't upstairs in the attic, I wonder what ever happened to it.

Saturday, March 24, 2007

Take Me Out to the Ball Game

The Iowa Hawkeye's baseball team had their home opener yesterday, a double header to open a 4 game stand with North Dakota State. In the past two years since moving here we have listened to, or more correctly heard, Iowa baseball games because Duane Banks Field is directly across the railroad tracks from our house and the announcer is darned loud.

When we started working over here in spring of '05 I told Lisa that the baseball diamond was the one thing that would remind us of our old place. With night games our neighborhood is illuminated by the field's mercury lights. We used to live directly across from the Mercy Hospital Parking ramp which was lit 24/7.

Anway, the Hawks were at home yesterday so I asked the girls if they wanted to go. We tuned in the first game of the DH on the radio while coming home from school. You know you may be starting your home season a little too early when the giveaway admission prize is a free Hawkeye stocking cap to the first 500 fans. When we got home the game was tied 5-5 in the 8th. We walked over to the diamond. I figured if the first game ended right when we got there, no problem, we'll eat and watch part of the second game. Kids are free and adults are $3.00. You can't beat that.

The game had started at 3:00 and we got there at 5:45, there were maybe 200 people in the stands at that time, but lots of kids out playing wiffle ball too, and the stocking caps were all gone, so there must have been more at the start. It was still tied 5-5 in the bottom of the 9th when we arrived and went to extra innings.

Nothing happened in the 10th. ND State didn't do anything in the top of the 11th. In the bottom of the 11th Iowa had the top of their order up and got their lead off hitter on. They managed to get him over to 3rd with two outs, and as I'm trying to explain all of this to older daughter, I'll be damned if he didn't steal home to win the game. I told the girls I'd never seen that happen in person, and for it to happen in extra innings was even better. We stayed for the first 4 innings of the night cap, and Iowa was leading 2-0 when we walked home at 8:10. We had a great time and will definitely come back. I saw on the 10:00 news the Hawks won the second game 8-0.

Here is a shot from the front yard of the field lights. I took this when we got home:

Thursday, March 22, 2007

2 Years On Foxcroft: A Pictoral Celebration

Today is the second anniversary of the first post on Foxcroft. Here is a link to that humble beginning:

In the Beginning...

In the two years since, of course the biggest change has been completing the upstairs. Here's Bess' the builder's description of the attic:

"Increase the pitch of the roof making the attic higher. Have it high enough so two or three rooms could be finished off later if desired. I want window at the east (front) as shown in the picture, then would like one on the north and one on the south. The roof pictured is not high enough for these last two but when you increase the pitch, I think they can be put in. Saw a house this style not long ago that had them. Want them all so they will open, with weights like those down stairs."

Here is what the attic looked like in 1928:


Here is a shot of roughly the same place when we purchased the home in 1993:


Same spot when working on framing, summer of '05, when it was known as the "Lumber Room"


Same spot with framing of the other two bedrooms complete:


Same spot, Master bedroom today:


The biggest part of upstairs was opening making a new gable in the back of the house:

Before we started '05:


After we opened it up:


In progress:


Shingling Summer '06


Today:


New gable from the inside:

Summer '05


After cutting the roof off:


Framing in place:


The three above pictures were all taken on the same day

We went quite a while before the window got put in:


But it finally happened:


I'm afraid I don't have anything more current than this:


Laundry room:


I think that's enough for now...

Sunday, March 18, 2007

Presto Change-o! or Weird Deja Vu?

Continuing the dining room update:

Thursday I put on two coats of varnish, sanding between coats


I finished the last coat on Friday morning and knew we'd have to really hustle to get the room finished before going back to work on Monday. We had talked about two possible colors, both from the Sherwin Williams Arts & Crafts palette: "Portrait Tone" and "Roycroft Adobe." I got samples and painted 2 x2 foot squares of each around the room. Everyone's first choice except youngest daughter's was Adobe. Even the neighbors concur, and they have to look at our dining room at night when they are in their kitchen. Saturday night I primed everything and then started in on color Sunday morning


I was leery of using a red paint and wondering if I'd need extra coats to get it to conver evenly, but it went on easily. Even though it is an S-W color I still went to my Mautz paint store (they are owned by S-W now) and by using the best Mautz brand, and since I have an account with them, I also get a discount, so I got a much better price.


I think we did a great job of covering the spot where we had torn out plaster. I ended up using a texture product that I added to the primer to get the same bumps as the original plaster had. Compare this picture below with the third one from the top in this post to see what I'm talking about.


At our old house we had Bradbury & Bradbury wallpaper border in our living room and dining room, we will use the same pattern here. At the old place we used the "Prairie" border in the "Natural" color family. Here at Foxcroft we will use a ligher color family "Thatch." You'd think we picked the wall coler with the border in mind, but I didn't dig up the sample until after everyone picked Adobe.


I'd finished the second coat by noon and then late this afternoon I started moving furniture back in and haning pictures back up.


So after not having a dining room for a week, we celebrated with our corn beef and cabbage dinner a day late.


After I took this picture I was reminded of a March dinner we hosted at our old house 6 years ago. The photo below was taken by our by our now next door neighbor, before we had hatched up any of this moving stuff. You can just barely see the border paper at the top of the dining room. And while we left those curtains behind we bought another set just like them, which are in our dining room again. We certainly like what we like!

Wednesday, March 14, 2007

"you cannot bear to see a stain upon him..."*

* The quote in the title is from Henry Ward Beecher, American clergyman, born 1813. And like Henry, I cannot bear to see stain upon me, either, so today was a good day in that the stain ended up on the dining room floor, and not me.

I started off this morning by taking two pieces of baseboard outside and stripping the varnish off them. We had removed them when putting in the support columns for the new gable 2 years ago, I cleaned them and brought them back inside. Since I had Pete’s compressor and finish nailer I installed the one in the dining room


And the one in the hallway


Then I went to the hardware store to get some new base shoe for those two spots. Each section was just over 8 feet long, so of course the only length they had in unfinished oak was 8 feet. This isn’t a big deal in the dining room as the splice will be hidden behind the buffet, I tried to get a fairly inconspicuous spot for the hallway. I also wanted to pick up another quart of stain (it doesn’t come in gallons, not even from the company's web site. By now I really don’t need an entire gallon anyway! OF course it was out of stock, but as I was ready to leave in disgust, the young punk worker (who had not been particularly helpful up to that point, said that “Gunstock” is the very same color as “Mission Oak.” I took it and went home and sure enough they are the same number, 263.

I got out the hand miter box and cut my pieces, I had to hand cope one joint as well. Here is the exterior miter at the end of the hallway.


And the original coped shoe (left) fitting over the new (right)


The I puttied nail holes and got ready to sand the floor. I rent an 18 inch by 12 inch random orbital sander and went over the floor first with 120 grit screen then a 150 grit screen.


I went and returned the sander. When I got back the putty had dried in the nail holes so I sanded the baseboards and shoe with my hand sander. I vacuumed and wiped everything down with a tack cloth. I started to stain the baseboards and had just finished when Lisa came home. Together we started on the floor, spreading stain on with a pad and then wiping it up and evening out with paper rags.


In a little over an hour we had the room finished


Tomorrow morning I will put on a coat of varnish, with luck I could put on the second tomorrow evening.

Tuesday, March 13, 2007

I'm on Vacation?

It's Spring Break this week, so I've started on the dining room floor. I haven't had a good step by step process post in a while, so here we go. The first thing I needed to do was move out the chairs, some of which ended up in the library


Then I put the dining room table in the living room. I unloaded the buffet and put the boxes in the library. Then I put a rug under the buffet, and with Lisa steering, I pushed it into the living room too.


Since we took out the radiators when we put in the geothermal system I needed to patch the holes in the floor. The holes look like this:


I started by splitting the wood between the hole and the baseboard and getting it out. On one side one board was completely cut and another was slightly cut.I removed the completely cut board first.


I then took out the other one, luckily it was a short one so I removed the whole board.


Then I took my dremel and cut the other board even with the first


The other side was easy because only one board was cut by the pipe. I took out the cut part and did a dremel cut for an even line.


Since Pete took his saws home I couldn't cut the replacement boards. I also took the girls to stay with their grandparents tonight. When I got back home I started stripping the floor.


Lisa worked a half day, so when she came home she started in too.


Once we were nearly over the floor once I went to rent a sander for tomorrow and go to Pete's to cut floor boards. To get these to fit in I needed to bevel the groove side so that it will slip into place. After I cut the boards I gave Pete a ride to get his car at the garage, and brought back his compressor and finish nailer. I put the boards into place and nailed them in. Here's how they looked after stipping them.


To finish we used the floor buffer with rough nylon pads then with fine pads. Here is the floor after we were finished


And once it was all done we let our newest family member take a stroll through. This is Hailey, we got her at the animal shelter on Dec. 30th. She is five years old and is some kind of lab mix. She is truly a wonderful dog.


Tomorrow I will put the baseboard in that we took out to put the
support columns in the wall back in June of 2005. then I'll sand everthing very lightly and stain.