Scott stopped over last night and we siphoned the beer out
of the fermenting bucket and into a glass carboy. We will let it rest in the
carboy for a week or so before bottling it. I had taken the fermenting bucket
down to the basement on Sunday, so that sediment stirred up in moving would be
settled back down before siphoning.
Here is the fermenting bucket after removing the lid. There
was a very strong beer/hops/alcohol scent:
Before we opened the fermenter we had already sterilized the
carboy (again, since I had done it last week too) and the siphon tube and hose.
We then started the beer into the carboy:
After it had run a bit we filled the beaker for the hygrometer
so we could test specific gravity again. We tested it last week, and got 1.56:
Now specific gravity was 1.011, with a quick calculation we
know that the alcoholic content is almost 6%, which is right at the target for
our recipe. We filled a mug and tried it. The taste is not overly “hoppy” and
is very pleasant. We brewed using my hops that I transplanted to the back yard
in 2011 from the ancestral family farm in NW Iowa.
Since the hops were likely a type of
German Noble, they
are relatively low in alpha acids, meaning they are not as bitter as many
modern varieties. While the beer tastes and looks good, it does not have very
much carbonation. That is what we will create when we bottle it, by adding just
a bit more sugar to stimulate yeast activity.
So the beer is now in the carboy and in the back room
upstairs to sit at a warmer temperature than the basement.
Besides beer activity, we hosted Thanksgiving as usual. We
only had 10 on Thursday, the smallest group we have ever hosted. Several weeks ago,
my Dad pointed out that the local grocery chain had a special of “buy a ham,
get a turkey free.” I went and did that. The turkeys were small and the biggest
I could find was 9 lbs. While at the
store, I noticed that they also had frozen goose, so I bought one of those too,
and we are set for Christmas.
Imagine my surprise when I went to brine the turkey on
Tuesday night and I discovered it was only half a turkey! The drumsticks and lower
portion of the body weren’t there. If I hadn’t been so distracted by the goose,
I might have noticed this when I bought it. So it was good we had the ham to go
along with the white meat only turkey. Here it is before I put it in the
basement oven:
While getting ready for Thanksgiving this year that I
discovered that we have 4 turkey sized granite roasters, a smaller chicken sized
granite roaster, and an aluminum rectangular roaster. I’d say we’re set for everything.
I made one version of stuffing in the chicken roaster and used the most
interesting looking turkey roaster for our half bird. Here it was after 2.5
hours of cooking:
And after carving:
We used our special Thanksgiving tablecloth and got out the good
dishes and silver:
So the near record highs on Friday allowed me to get out
while everyone else was shopping to put away all the summer porch furniture and
rugs, and allowed me to even wash the porch floor before winter:
I even put up Christmas garlands on Sunday in my shirt
sleeves, I’ll need to get a picture of them later.
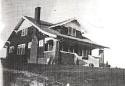 Here is a record of our restoration of a 1928 craftsman. We will be the second family to live in the home. Watch our progress when we prevail and our privation and pratfalls as we do not.
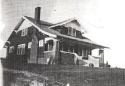


