Showing posts with label kitchen. Show all posts

Wednesday, December 06, 2017

Beer Update 2, and Home Improvements (Not at Our House)

Scott came over last night and we completed the next set of tasks in the creation of my "End of Term" beer to celebrate the completion of my tenure on city council.

Rather than work in the basement this time we worked in the kitchen. I set the carboy on the work table.
We had already sterilized 60 or so bottles, the bottling bucket, the siphon system and the bottle filler. This is done by washing them all in bleach water and the rinsing in clean water. Scott inserted the siphon system and we started to fill the bottling bucket.

 After we had started the siphon going we decided to have a little taste so we partially filled a mug and tried it. I don't want to jinx this process, with a rash prediction, but we were both pleased with what we had.
 After the bottling bucket was filled Scott attached the bottle filler to the siphon hose and started filling our sterilized bottles.
 My job was to take the full bottles and cap them. I bought my bottle capper in 1982, when as a first year teacher I made root beer with my 5th graders for our Halloween party, a tradition I carried on for three more years. Scott had never seen a capper like that so he wanted a turn at trying it out. So he capped our final bottle.
 In the end our batch made exactly 50 12 ounce bottles of beer.
 Youngest daughter saw my photo above and said it wasn't artsy enough so she shot a better version. Her's does a much better job of showing off the hops cone bottle caps I bought for our brew.

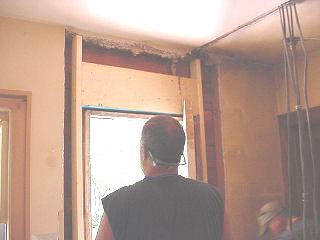
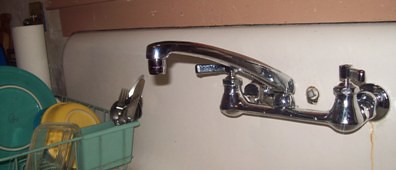
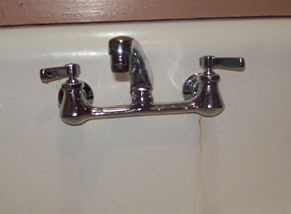
So despite working on our home at glacial pace, I've actually picked up a few jobs on the side. I finished one last weekend, so here are some shots from that. "Susan" (not her real name) is a new faculty member at the University of Iowa and has bought a nice bungalow on the east side of Iowa City. Over the summer I did some work in her kitchen and installed a correct period front door. She said that she wanted a tin ceiling in the kitchen to cover a not so great plaster job and I agreed to work on it with her.

First thing we needed to do was cover the ceiling in 3/8 inch plywood.
 After doing that I snapped out lines and started to install the ceiling panels.
 A couple weekends after finishing the ceiling panels I went back to install trim around the walls to make the project look "finished." In the shot below you can also see the paneled box I created last summer to hide the soil and water pipes that run to the upstairs bathroom. Originally this area, and the furnace chimney were covered by a plaster wall bump out. Susan wanted the get some exposed brick in the kitchen so she had the plaster removed, but wasn't expecting to see pipes. She is pretty handy herself and has been stripping the woodwork on the window and doors and will take them back to their original varnished condition.
 The kitchen is not big but it certainly had interesting challenges, working around the stairway to second floor led to some creative cutting but I think it looks quite good now.
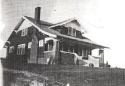
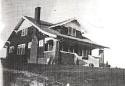
Tuesday, May 05, 2015

Kitchen Update #2

I was able to install more trim over the weekend. First I had put to put 1 x 4 around the back door. Somehow I managed to lose the piece that went on the left hand side of the door and was cut out for the door lock catch, but waiting 10 years after removing it, that will happen... I did find the piece that went over the door, but that was no good to me, since originally the right hand side of the door was a perpendicular wall. With that wall removed I needed to cut a right hand side panel and then have the top go over it, so the original was too short. I picked up trim at the Salvage Barn. It was three pieces painted all over 84 inches long. Since it was painted it was half off, so I paid $8.00 total.

I stripped the paint off the boards, sanded and then cut them to fit. I then primed, painted and installed over a two day period. I think the part around the lock turned out OK.

My picture is bad but here it is now:

 Compared to how it looked in 1928:

In my defense, because we took out the closet to the right of the door we had to make both sides match, and be part of a single plane which they weren't originally, so we had to install a shim under the trim, which recesses the lock catch a bit.

Up next: Getting back band cut and fit around the back door so I can then complete baseboards, and the upper trim.

Wednesday, April 29, 2015

Kitchen Update #1

Here is a first kitchen update after announcing that we were actually doing something.

Last week I finished painting the wall and some trim. Here is a shot of the sink and the edge of the cupboards:


Since I've taken this picture I have:
  • returned the brass switch and outlet plates
  • put up the trim at the top of the cupboards
  • added the trim that runs around the kitchen between the window and cupboard
  • added quarter-round to the baseboard
  • added base shoe to the cupboard toe kick area
Here is a picture of the nook:


I just se the table in place, I haven't attached it yet. You can see the trim above the nook, that will run all the way around the kitchen.

What I'm working on now:

  • trimming out the back door
  •  baseboard for the exterior wall on both sides of the door
  • upper trim on both sides of the door
Hopefully I'll have some more pictures to share in a couple of day...

Thursday, April 23, 2015

Last MAJOR INTERIOR Project, REALLY!

I know it's been quite a while since anything was published, but I want to say that the LAST MAJOR INTERIOR PROJECT at Foxcroft is well underway: THE KITCHEN.

Every time Lisa has asked when we would do the kitchen, I have answered "Last." This is because nearly every other project required us to track materials in through the back (kitchen) door.

Over spring break we had plasterers come to fix the corner where we had removed the bump out that was Bess' closet from her bedroom. We had removed the closet a mere 10 years ago in June of 2005.

While I will flesh this out and give details about what we've done in the near future, here is a photo montage of the kitchen from when the house was built (1928) through today, in progress:

BLUE PRINTS
Here is the kitchen layout from the blueprints. The back door opens between the half wall of the nook, and a bump out bedroom closet. This would have been extremely narrow. The small area marked "Brooms" was another closet, that opened in the kitchen. The fact that Bess was getting an ELECTRIC REFRIGERATOR rather than an icebox was a big deal, and noted in the plans:

One of the most charming parts of the kitchen plans was the breakfast nook. Bess had found separate images of how she wanted the table and the benches to look, and given them to her designer:

1928 Photos: 
THESE 4 PHOTOS WERE ALL TAKEN SHORTLY AFTER THE HOUSE WAS BUILT.
For ALL PHOTOS below click on the image to see a larger version:


This photo was some time after 1928 and before 1948:

In 1948 the half wall and bench of the nook were removed.
These photos are probably shortly after that:


The next three images show what the kitchen looked like the first time we were in the house on Dec 19, 2003:


The next four photos show removing the broom closet, and the bump out bedroom closet
on June 9, 2005. Read about that here:


We had to put a header over the back door to carry the load of the gable we added upstairs. the first photo below shows that. The second photo shows the  light switches shown on the bump out above that had to be relocated, this would be about a week after the pictures above.


So here is the kitchen after the plasterers came, and I just finished varnishing the floor. There will be more updates to come.


Saturday, February 28, 2009

There's a Hole In the Bucket!

I knew if I posted about the sink's cold water stem no longer leaking from the wall it would start again. So yesterday I took the entire assembly off AGAIN. I wrapped teflon tape around the cold stem AGAIN, I reassembled the whole faucet AGAIN. I was happy. Then as I was sitting at the breakfast nook table working on taxes, I noticed that the faucet was DRIPPING. Arrgh. I was right back to where I started a month ago. My thought was that sediment from the pipes had gotten into the stem and were keeping it from shutting tightly. So I spent the afternoon getting up and turning the water on and off every 20 minutes or so. When I got up this morning the sink was dry. But I'M NOT SAYING IT'S FIXED! For the record this is the 5th faucet I've installed in this sink in 4 years, but in my defense several were salvaged ones that I had to put on in a pinch...

The good news is that while I had the faucet off I was able to remove the plug for the third hole in the sink. The better news was that no water came spraying out of the pipe, but I was pretty confident since I knew that pipe ran down to the basement and was not connected to anything. Now I can jerry-rig something together for a soap dish.

So here's a little trip down memory lane of posts about the sink:

kitchen faucet

Holiday Plumbing

Sunday, February 22, 2009

Still Do Any Work Around Here?

To answer a persistent question, yes.

Here's an update on a project that actually has been completed. The issue that led to my recent rant regarding the kitchen faucet has been resolved. The not-repaired stem was inserted back into the faucet and failed completely a week later. I then paid a visit to my brother-in-law at the plumbing supply store to get a better quality faucet.

There was a Chicago brand faucet in stock, and after being satisfied that this would be the last faucet I installed for some time I bought it. My specific questions were:

  • Do the stems have rubber washers or ceramic?
  • Are the washers replacable?
  • Can I order new washers?
  • Can I get new stems?

Jim's answers were:

  • Both rubber and ceramic fit this model. If the rubber go bad quickly due to heavy use, replace with ceramic
  • Yes
  • Yes
  • Yes


This answers made me very happy. Here is the faucet installed:


One week after I installed it I noticed rust stains from a drip at the cold tap:

I was of course fearing the worst as the supplies barely come up to the openings in the sink. But thankfully it was the connection between the adapter that fit onto the supply and the faucet itself that was not tight so I DID NOT have to disassemble the entire unit. I cleaned up the rust and it seems OK. (knock wood)

My only regret with this model doesn't have a built in post to add a soap dish. However I think that perhaps I can kill two birds with one stone here. In noticing the THIRD hole in the sink, there was a pipe for a cistern line originally. I can state with complete confidence that there NEVER was a cistern, as it isn't mentioned in the original contract, blueprints, or show anywhere in pictures. I do have original kitchen photos with a third faucet but it was likely just a dummy. There is no pipe coming down the back of the sink, nor is there any hole in the original floor for a pipe to go to the basement. I think if I can work the plug off and there is some little bit of pipe there I might be able to fashion some adapter and mount the soap dish from the previous faucet...

Wednesday, January 30, 2008

IF The Iceman Cometh...

... We will be ready.


The day that the temperature falls 50 degrees was the perfect day to get my Christmas present from Lisa picked up. As you can see above it is two pieces from the Iowa City Ice Company. I had owned the ice pick for years. We bought the sign from my parents' sale when they moved into their apartment. The sign was designed to hang from your back porch window, there are holes on all four sides, and whichever side was up indicated how many pounds of ice you needed delivered.

Foxcroft never had ice delivery. I have a letter from the designer/builder asking Bess if she wanted an opening from the porch for direct ice delivery into the house. She replied that she was planning to get a new electric icebox. The builder then wrote that they would put an additional electric plug into the kitchen design. Here is a picture of the original icebox:

Wednesday, July 25, 2007

Scr*w the Timetable!

Every time Lisa asks, "When are we going to do the kitchen?" I always answer, "LAST!" because we always come and go through the kitchen door and I want all the other messes finished before we do it!

I came home yesterday from the office to see Lisa grinning like the Cheshire Cat. For the last few days she's been on "vacation" which means she was stripping doors.

"Go in the kitchen." she said. When I walked in I saw this:


Which when I looked closer was this:


If you see the "babyshit brown" color on the table leg, that is what all the woodwork in the kitchen is painted. I am nearly finished repainting the cupboard doors, and will hang the last of them tonight. (Imagine that brown on the outside and signal orange on the inside of the cupboards. Lisa reapainted the insides even before we moved in two years ago) The top of the table was that color too, until yesterday. What you see is how it looks after stripper, but no sanding. It was originally painted, but we'll go ahead and stain and varnish since it looks so good. Now we'll see if we can strip the bench and get as good a results.

So last night after getting the kids to bed and taking the dog for a walk I was inspired to try to take the formica off the counter top and see how the original pine top looked. So I peeled off the edge:


And started peeling off the top:


It wasn't too long and I was down to the plywood that covered the original top:


I got out the cordless drill and a mere 76 screws later had the plywood off:


It looks as though the original was shellacked then varnished and in spots the varnish failed and then of course the shellac would too in short order, so it all got covered up. Lisa started cleaning with hot water and TSP:


Here's the end that's down to bare wood:


And another shot


Maybe this was just an extreme way to clean all the junk off the couter?


Ideally if I can get the entire top off there is a cabinet maker in town that I could take it to and run through his planer to take just the very top edge off and get it looking good. Anyone out there do this? What are suggestions as to what to finish it with? I'd love to hear your ideas.