Showing posts with label window repair. Show all posts

Monday, January 06, 2020

Where has the time gone?

After quite a long pause, I'm resolving in 2020 to get back to blogging about good old Foxcroft.

To say the least the last decade has been busy and eventful at our house. A major factor in my slowing down on posting was that from 2010 through 2017 I served on our local city council. That certainly cut down on my free time to write. In July I also retired from my day job. The last six months have been my "gap year" with a good deal of time spent:
  • Straightening the garage (AGAIN) see earlier post here
    sadly the pictures are lost...
  • Replacing the original roof on half of the garage 
  • Adding 2 inches to the bottom of 7 salvaged storm windows in order to finally have every window with a storm and screen
  • With storms in place I have begun to remove interior double hung windows and renovate them. These windows are now 91 years old and this is the first major attention they have ever received. 
So I don't know if any of the faithful readers from 10+ years are still around, but if so, I'll be publishing again.

Monday, July 26, 2010

Rope a Dope

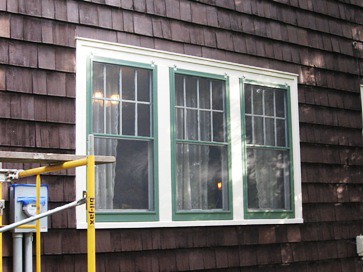
I continue to plug away at painting this summer, even if I haven't said anything about it. I'm working on the Southeast side of the house. This is the side that shows the most damage from weather. It is also where the triple dining room window is. Here is the window in the midst of being heat gunned/scraped:


The far left side hadn't been done yet


Here is one of the center sections


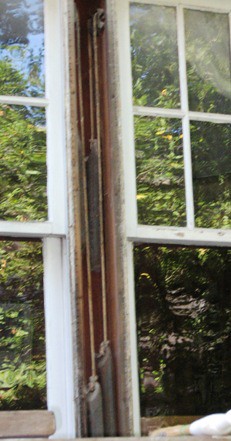
After heat gunning the paint off the boards in the center sections were in bad shape. I knew I'd need to sand down to bright wood in order to get any new paint to stick. Since they were so loose anyway I decided to take them off, which of course exposed the window sash weights and cords.


It was then that I realized how much easier it would be to replace the old sash cord FROM THE OUTSIDE. I wouldn't have to knock open the channel pocket and reach in and up or spend nearly as much time threading the cord through the pulley. I went and bought new cord, since I was nearly out and I found a thicker cord than I'd ever seen before. It was so thick I could barely get it through the holes in the weights. but it sits very nicely in the pulleys.


So the center window is completely re-roped and the two outside windows have their inside ropes replaced. In other words of the 12 ropes in the window section 8 have been replaced. I'll do the outer ropes on the outer windows when I'm ready to reglaze those windows in the future.

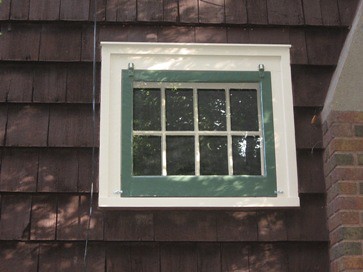
After getting the outside boards clean I put them back into place. I used bondo to fill in the cracks in the board to get a smooth surface again, and sealed them up at all the edges. I did the same to the chimney window next to the fireplace. Here is that one ready for priming.


So how does it all look now? Here are the dining room windows completely painted and with my new screens from
Adams Architectural in place. (Storms will go up this winter)


Here is the chimney window.


I have been back up working in the eaves and repairing the lookouts that hold the barge board in place. I'll post on that next.

Monday, October 12, 2009

Road Trip 2009

As mentioned before, I did finish my shingles and then took down the scaffolding for winter. Here are the new shingles above the window:


As soon as I took everything down I got a call that my new dining room storms and screens were ready. I had ordered these about a month ago from Adams Architectural. I had Adams build windows for the new gable we put in upstairs, and they also did the wooden storms and screen that we have on second floor. We then used them to build storms and screens for the back of the house. I really am impressed with their work. When I called to order three more, I was surprised to learn they had moved from near Davenport (an hour away) to Dubuque (an hour and 45 minutes away)

Friday I drove to Dubuque to get my three storms and three screens. Adams new location is in the warehouse district of Dubuque, and very picturesque area:


I went in to say "hello" and then got sent out to drive to the loading dock:


In five minutes I was loaded up:


But I wasn't ready to go home yet, because on the other side of the block where Adams is located is The Restoration Warehouse (formerly Mid-America Salvage) which is the place I got our flooring and bookcases.

I spent an hour looking around and am interested in what looked like a grill from an old service elevator that would make some nice fencing back by the fish pond. I hope they email me a price as the piece wasn't marked.

So added to my winter project list will be painting the storms and screens so they can be hung in the spring.

Tuesday, September 29, 2009

An OUTSIDE "Mushroom Factor" Tale

It's been a while since I've had a "mushroom factor" experience. I wrote about the phenomena here: The Mushroom Factor. Basically the mushroom factor is what happens when what looks like a small project quickly "mushrooms" into a much bigger one when you realize all the sub projects that need to be completed.

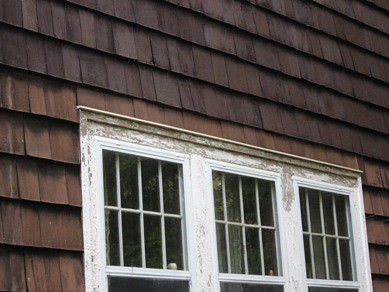
I was hoping to scrape and paint the trim on the dining room and chimney windows before winter. I also thought I could probably stain the shingles around them too. That was before I noticed how rotten the drip cap was above the three dining room windows:


The drip cap was just as bad with chewed up shingles above the west chimney window too:


The shingles are two layers deep and are attached from the bottom of the wall up to the top. This means that to replace the drip cap I need to remove TWO layers of shingles whose ends are buried by those above them.

I decided to get a razor blade and cut away at the first layer carefully to see how hard it might be:


I quickly realized I needed a better tool for this and went to visit Pete. I told him what I needed and he sent me home with this:


That is his "toolwerks" tool. We put a head on it with teeth and the whole thing reciprocates like a tiny sawzall.


I went home and had the first layer out in no time at all. Here is what I removed:


And here is the second layer of shingles exposed and ready to cut. You can faintly see the lighter line behind the bottom of the upper row. That is the exposed new cedar against the older stained wood:


I had the second row out pretty quickly too. I cut at an upward angle, hopefully I can duplicate that angle on the new shingles I'll add later. Here is the same area with the second layer removed:
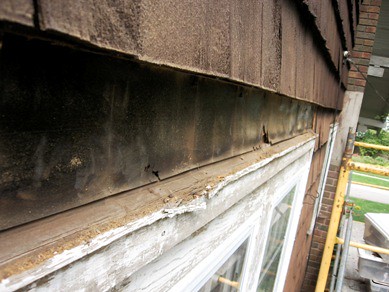

I then got out my "catspaw" and pried out the drip cap:


And here is the area with the old drip cap out:


I was able to cut some new drip cap to fit above both the dining room and chimney windows. I'm almost done painting it and will install it later this week.

I'm hoping over the weekend to cut new shingles to put back up in place...

So the upshot is I probably WON'T get the trim painted or the rest of the shingles stained, yet this fall. There are home Iowa football games the next two weekends, and the weekend after that I promised Lisa we would try to finish stripping the floor of the office so we can get it varnished before winter too.

I will probably take down my scaffolding after getting the new shingles in place and admit that the "mushroom factor" has once again gotten the better of my schedule!

Monday, February 04, 2008

What Are You Looking Through AT?

I’ve been working on windows lately. (and really what old house owner ISN'T always working on windows?) I repaired and re-varnished all the upstairs windows last summer, but had never gotten to putting stops back into the window frames after I did all that, because I didn’t want to have to cut all the stop material.

As part of the salvage that FHP did a couple weeks ago I was able to get some stop material from the windows in the old Law School. But this is not ordinary stop, it was all screwed into place (which is WAY more convenient if you ever have to take the windows out. What I noticed right away was that the stop was mitered at the corners. All stop I’ve ever stopped (pun intended) to look at was butt jointed.

When I started to remove the stop I discovered that the front was mitered and the back was butt jointed! Here is a shot of a side piece:


Here is a shot of the top piece:


And together:


And tight:


And from the back:


The windows I took the stop from were all much bigger than our windows, so I’ve had to cut them down. A few also had extra nail holes so I’ve actually replicated all the cuts with my hand miter box. I think this is a very ingenious way to fit the parts together. Has anyone else ever seen this?